Welcome to our website

Lorem ipsum dolor sit amet, consectetur adipisicing elit, sed do eiusmod tempor incididunt ut labore et dolore magna aliqua. Ut enim ad minim veniam, quis nostrud exercitation ullamco laboris nisi ut aliquip ex ea commodo consequat.

Duis aute irure dolor in reprehenderit in voluptate velit esse cillum dolore eu fugiat nulla pariatur. Excepteur sint occaecat cupidatat non proident, sunt in culpa qui officia deserunt mollit anim id est laborum. ed ut perspiciatis unde omnis iste.

Donnerstag, 31. März 2011

Troubleshooting Microsoft CRM 2011 Online Outlook Client Installation

Troubleshooting Microsoft CRM 2011 Online Outlook Client Installation

Here are some Microsoft Dynamics CRM 2011 Online Outlook Client installation errors that I had encountered so far and how to resolve them.
Note: Always check that the latest version of the CRM 2011 Outlook Client is installed.  Also ensure that the CRM Outlook Client is installed properly.
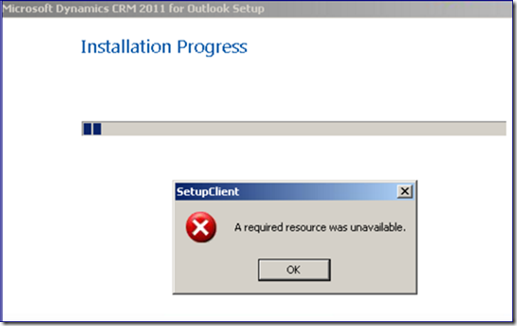
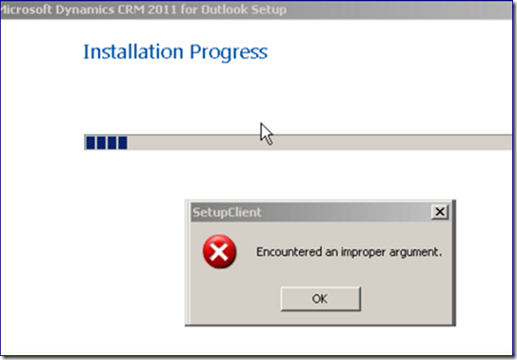
  • Receive the following messages during installation:
    A required resource was unavailable
    Encountered an improper argument
    The command line argument is not valid.  Verify the switch you are using
Resolution: Re-start Windows and then Un-install/Re-install the CRM Outlook Client
image
image
image

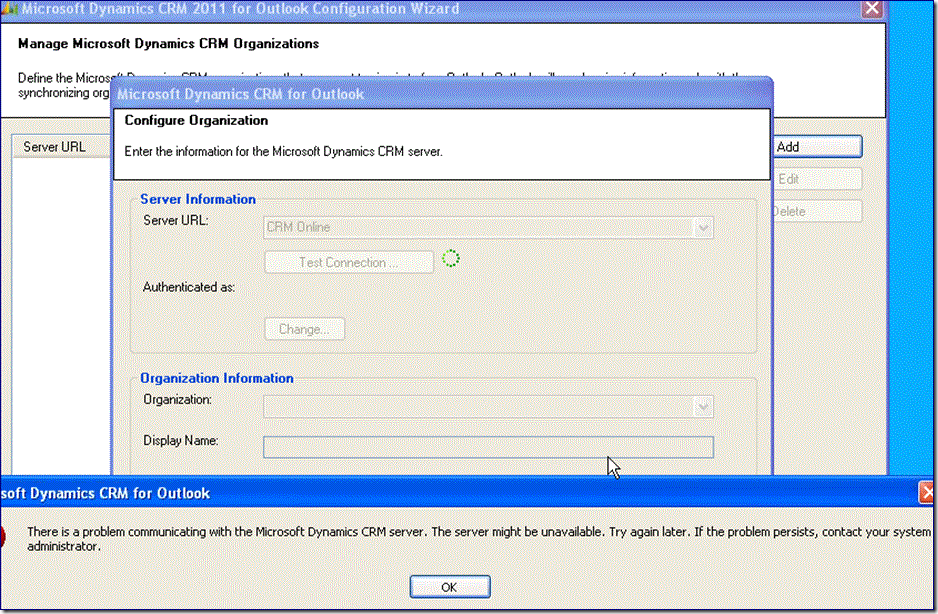
  • Receive the following messages during configuration:
    There is a problem communicating with the Microsoft Dynamics CRM server
Resolution: Un-install the CRM Outlook Client, Windows Live Essential and Windows Live ID Sign In Assistant.  Then Re-install.  If you want to keep Windows Live Essential intact you can try to repair it first.
110130_CRMOutlookConfigurationIssue
image

  • Microsoft CRM Outlook Toolbar, CRM Menu and Folder content not showing up
Resolution: Un-install CRM Outlook Client, Repair or Re-install Microsoft Office, then Re-install CRM Outlook Client
110130_CRMOutlookToolBarMissing
110130_CRMOutlookFolderNoContent

Dienstag, 29. März 2011

Microsoft Dynamics CRM Sales Process (CRM Online 4.0) needs to be converted for CRM 2011

Microsoft Dynamics CRM Sales Process

            
A sales process is a standardized series of activities that occur during a sales cycle. As the sales cycle progresses and activities are completed, the probability of winning the deal gets greater. In Microsoft CRM v 3.0 the sales process functionality was displayed graphically on the Opportunity form (as shown below) with the ability to skip stages in the Actions menu.
image
As CRM activities are completed or canceled (configurable) the sales process would continue and update the opportunity sales stage and probability accordingly (configurable). The "Sales Pipeline" report (as shown below) graphically displays all opportunities by sales stage.
image
In Microsoft Dynamics CRM v 4.0, Windows Workflow Foundation has been incorporated into the core product to provide robust automation capabilities. This highly configurable workflow tool/engine has eliminated the need for the v 3.0 Sales Process functionality. To reproduce the v 3.0 Sales Process functionality in CRM v 4.0 you need to perform the following tasks:
  1. Add the Pipeline Phase (schema name: stepname) field to the Opportunity form and publish the customizations
  2. Create a new workflow called Sales Process
    • Entity: Opportunity
    • Start when: Record is created (possibly On demand if you will need to run it against existing opportunity data)
    • Insert a Stage
      • Update Record: Opportunity (manually set the Pipeline Phase and Probability)
      • Create Record: Add an activity such as a Discovery Phone Call
      • Wait Condition: Wait until the previous activity is completed or canceled
    • Continue to build the remaining stages of your sales process
  3. Publish the Sales Process workflow
The following screenshot provides an overview of how the sales process can be implemented in Microsoft Dynamics CRM v 4.0. This is a very simple, three stage sales process where the pipeline phase is set and the probability is incremented from 20 to 40 to 95% as activities are completed or canceled.
image
Click here to download this sales process example. Now that you see how easy it is to configure an automated sales process that dynamically updates your opportunity, think about what else you can do...
UPDATE: I have created an instructional video on this specific post that walks you through the process beginning to end.

Sonntag, 27. März 2011

Dynamics CRM 2011 White Paper: Microsoft Dynamics CRM 2011 Configuring Claims-based Authentication

White Paper: Microsoft Dynamics CRM 2011 Configuring Claims-based Authentication

image
In Microsoft Dynamics CRM 4.0, external users, who weren’t using VPN, could access the Internet via forms authentication.
Microsoft Dynamics CRM Server 2011 replaces forms authentication with claims-based authentication. This is an identity access solution designed to provide simplified user access and single sign-on access to Microsoft Dynamics CRM data.
The Microsoft Dynamics CRM 2011 Configuring Claims-based Authentication white paper covers this solution, plus you’ll learn about:
  • Installing and configuring AD FS 2.0.
  • Installing and configuring Microsoft Dynamics CRM Server 2011 claims-based authentication for internal access, external access (IFD)
  • Federation trusts, Microsoft Office Outlook connections, and other configuration considerations.
This white paper is available for download from: Microsoft Download Center
And will soon be available for browsing on: Microsoft TechNet
Please use the feedback link at the end of the document and let us know your thoughts.

======================================================================================
This is content from http://www.dynamics-crm-2011.de | Dieser Beitrag ist von http://www.dynamics-crm-2011.de
Themen rund um CRM 2011 onpremise, Dynamics CRM 2011 Online, Dynamics CRM 2011 mit IFD und Claims.

+++++++++++++++++++++++++++++++++++++++++++++++++++++++++++++++++++


Updating custom entities icons

For all our projects, we are always customizing Microsoft Dynamics CRM 4.0. To achieve that, we create many custom entities and one of the worst aspect of that heavy customization is to have a lot of custom entities with the same icon. So, it is difficult to identify them just with their icon (like the screenshot below).CustomEntitiesStdIn order to customize further the application, it is a good thing to add different icon to each custom entity.
The standard approach
This approach consists of using the standard feature of Microsoft Dynamics CRM 4.0 to update custom entites icons. In the customization view, just click on the menu “More actions” and click on “Update icons…”.
UpdateIcones
You then need to provide a file for each required icons:
  • icon in web application (16x16 / gif / less that 10kb)
  • Shortcut icon in Outlook (32x32 / ico / less than 10kb)
  • Icon in entity form (66x48 / gif / less than 10kb)
UpdateIcones2
As you can see, it has a lot of restriction and you need to create your own ico file, which is not always an easy thing. And let’s be realistic, everybody is not an artist and can create icons…
The best approach

The best approach, from my point of view, of course…
… is to use the Demonstration Tools provided by Microsoft (download here). This tool as many features but one of the best is “Icon Maker” feature.
DTIconMaker
  • The “Icon Maker” allows you to select a file for each of the three required icons or a file for the three of them.
  • It helps you to create the Entity Form icon with a background (which is the hardest icon to produce by your own).
  • You can use BMP, PNG and JPG image format, not only GIF
DTIconMaker2 Just select your image(s), adapt the Entity Form icon, and click on “Publish to CRM” button to select the entity to update.
DTPublish
If the icons are not beautiful enough for you, you can also save the three resulting icons to update them using your favorite drawning software.
DTSavedIcons
The final result:
CustomEntities2
Some resources


Free icons:
http://www.famfamfam.com/
http

Sonntag, 20. März 2011

Microsoft Dynamics CRM 2011 - Objektmodell - JavaScript - Codeschnipsel - Java Sciptcode für Dynamics CRM 2011

Mit CRM 2011 hat sich das Objektmodell für JavaScript geändert. Hier findet ihr ein paar hilfreiche Codeschnipsel für CRM 2011.
Den Wert eines Feldes auslesen
Xrm.Page.getAttribute(“Feldname”).getValue() ;

Den Wert eines Feldes setzen
Xrm.Page.getAttribute(“Feldname”).setValue(‘NeuerWert’);

Den Wert eines Lookup-Feldes auslesenvar lookup = new Array();
lookup = Xrm.Page.getAttribute(„Feldname“).getValue();
lookup[0].id;
lookup[0].name;
lookup[0].entityType

Den Wert eines Lookup-Feldes setzenvar lookup = new Array();
lookup[0] = new Object();
lookup[0].id = ‘GUID des Datensatzes’;
lookup[0].name = ‘Name des Datensatzes’
lookup[0].entityType = typeValue;
Xrm.Page.getAttribute(„Feldnam“).setValue(lookup);

Ein Feld anzeigen/versteckenXrm.Page.ui.tabs.get(„Feldname“).setVisible(false);
Xrm.Page.ui.tabs.get(„Feldname“).setVisible(true);

Eine Sektion (Tab) anzeigen/verstecken
Xrm.Page.ui.tabs.get(2).setVisible(false);
Xrm.Page.ui.tabs.get(2).setVisible(true);

Anstelle des Indexes für den Tab kann auch der Name des Tabs verwendet werden
Das OnChange Ereignis eines Feldes aufrufen
Xrm.Page.getAttribute(“Feldname”).fireOnChange();

Den ausgewählten Eintrag einer Pickliste auslesen
Xrm.Page.getAttribute(“Feldname”).getSelectedOption().text;

Den Wert einer Pickliste setzenXrm.Page.getAttribute(„Feldname“).setValue(parseInt(Wert));
Den Level setzen
Xrm.Page.getAttribute(“Feldname”).setRequiredLevel(“none”);
Xrm.Page.getAttribute(“Feldname”).setRequiredLevel(“required”);
Xrm.Page.getAttribute(“Feldname”).setRequiredLevel(“recommended”);

Focus auf ein Feld setzen
Xrm.Page.getControl(“Feldname”).setFocus(true);

OnSave Ereignis abbrechen
event.returnValue = false;

Twitter Delicious Facebook Digg Stumbleupon Favorites More

 
Design by Free WordPress Themes | Bloggerized by Lasantha - Premium Blogger Themes | Free Samples By Mail