
14:18

Dynamics Consulting München
-
Do you know how to
create mail merge template in Microsoft CRM?
The following instructions to create Microsoft CRM mail merge template
require you to have Microsft CRM Outlook add-in installed on your outlook, and
you need to open outlook while creating the template:
- Go to Settings from Microsoft CRM home page.
- Click Templates on the left navigation panel.
- Click Mail Merge Templates on right content panel.
- Click button New to create the new mail merge template.
- Fill in the mail merge template details and leave the File Attachment
fields empty.
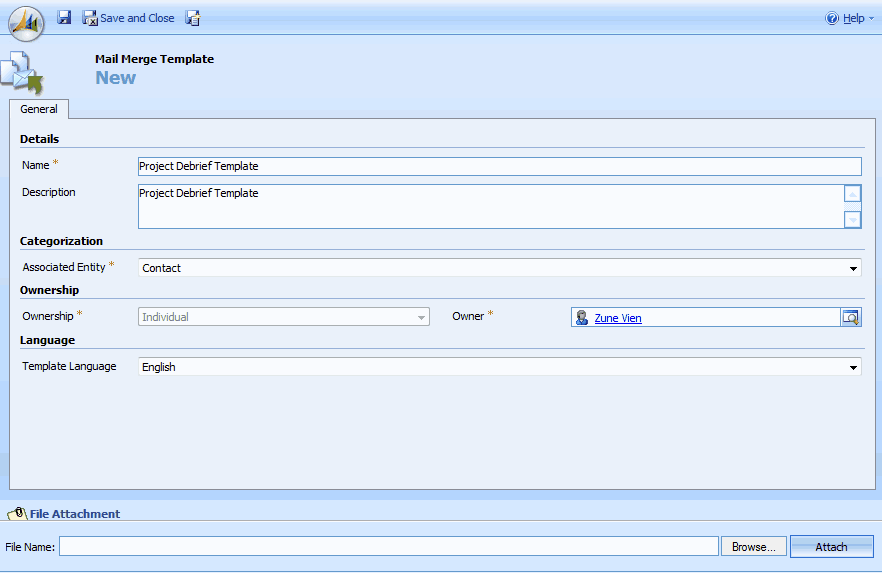
- Figure: Fill in mail merge template details
- Click the Save button to save your template.
- After you save the template, click the button Create Template in Word
to start creating the template content.

- Figure: Create Mail Merge Template
- A Microsoft Word document will be open on your machine. You'll see a popup
about Mail Merge Recipients, click Ok to proceed.
- Follow on screen instructions on the right panel of the word document to
create the template.
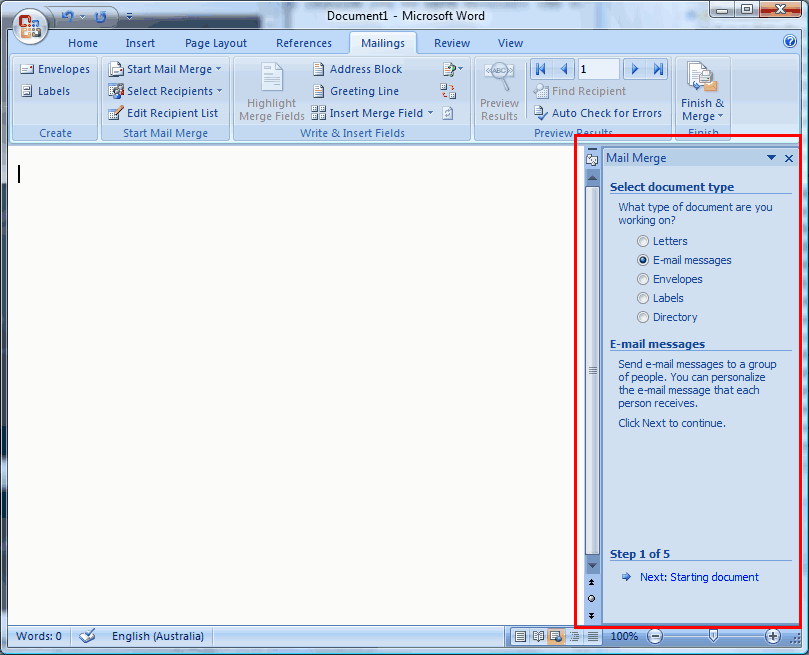
- Figure: Follow the instructions to create template content
- At the last step of Mail Merge instructions in Microsoft Word, click
Upload Template To CRM and click Yes on the popup window to save
your template in CRM.
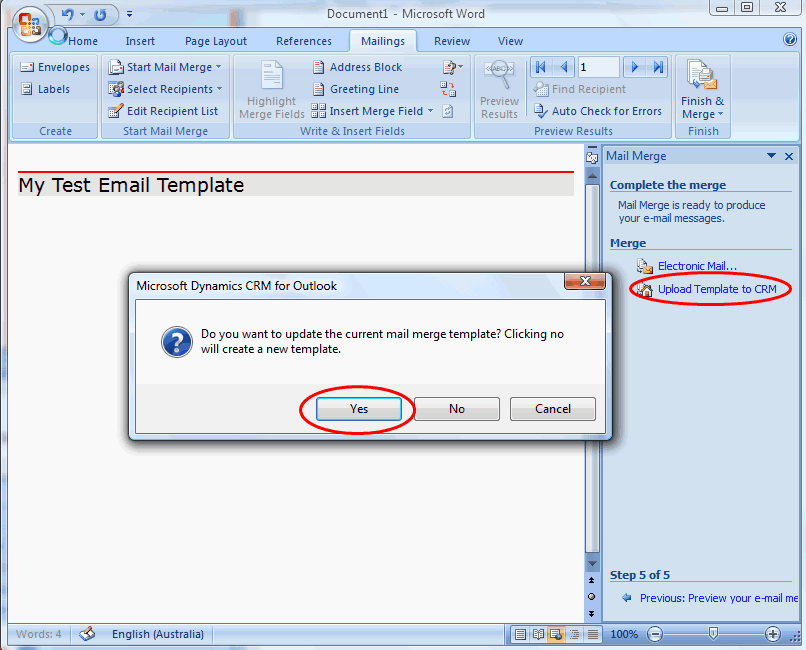
- Figure: Save Mail Merge Template To CRM
-
- Go to Settings from Microsoft CRM home page.
- Click Templates on the left navigation panel.
- Click Mail Merge Templates on right content panel.
- Double click the template that you want to edit.
- On top of the template details window, click Edit Template in Word.
- A word document will be open like when you create the template, from there
you can follow on screen instructions to edit the template content.
- At the last step of the Mail Merge instructions, click Upload Template To
CRM and click Yes on the popup window, to save the template in the
current template record that you open in Microsoft CRM.
-
- Figure: Save Mail Merge Template To CRM
-
While editing your mail merge template in Microsoft Word, you can add CRM
data field in the template.For example, I can add the contacts' first name in my
mail merge templat
- While you're editing your mail merge template in Microsoft Word, click the
Mailings tab.

- Figure: Click the Mailings tab
- Click Insert Merge Field on the Ribbon.
- Select the field from Microsoft CRM that you want to insert, in this case
I'm inserting contact's first name.
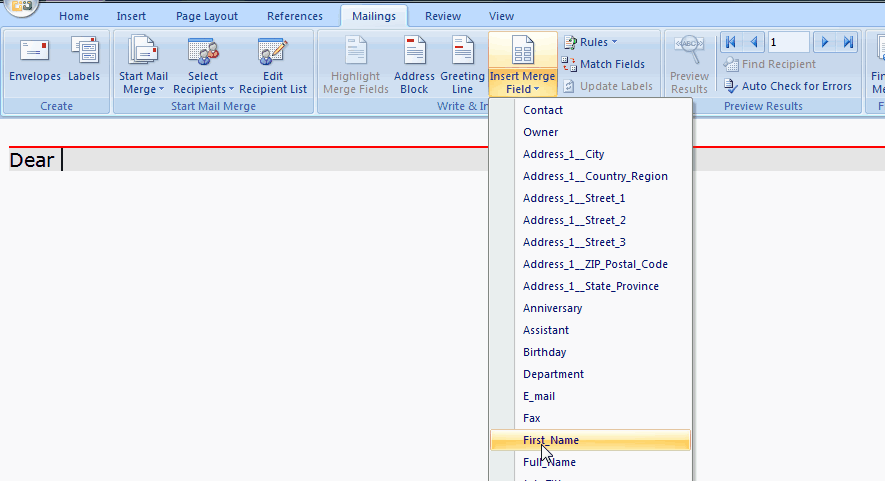
- Figure: Insert contact's first name in mail merge template
- Finish your editing your template and upload the template to CRM.
-
You can use mail merge template, to send email to account, contact... Each
mail merge template is associated to an entity, and you can only use the mail
merge template that associated to the entity you're sending email to. In the
following instructions, I'm sending email to the contact entity:
- From Microsoft CRM homepage, click Contacts to view the list of
contacts.
- Search for the contact that you want to send email to.
- Highlight the contact that you want to send email to, and click the mail
merge button.
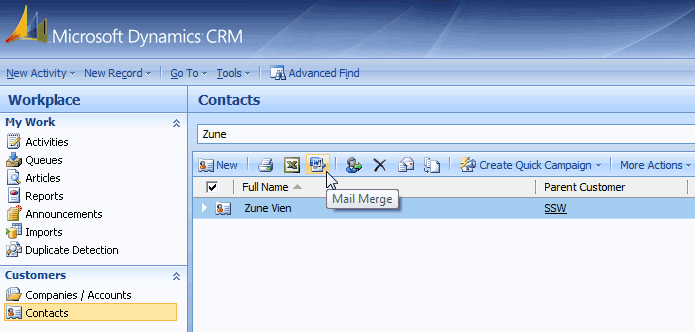
- Figure: Mail merge button
- At Select the mail merge type, select Email.
- At Start with a, select either personal mail merge template (this is
your own template), or the organization template (this is the template that is
used by the whole organizaion).
- At Merge, check Selected records on current page check box.
- Click Ok
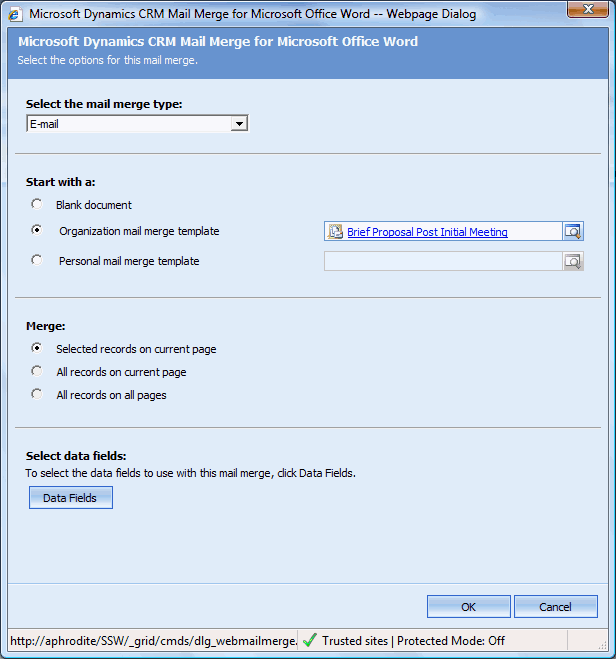
- Figure: Fill in the mail merge details
- A Microsoft Word document is open, and the Mail Merge Recipients
window is pop-up with the list of contacts that you're sending email to.

- Figure: Mail Merge Recipients
Attention
If you don't see a contact in the recipient list, that means your contact
either has Do Not Emails or Do Not Bulk Emails field set to be
Do Not Allow
- Follow the on screen instructions in Microsoft Word and edit the content of
the email that you want to send.
- At the last step of the mail merge instructions in Microsoft Word, click
Electronic Mail and fill in the subject line for your email.
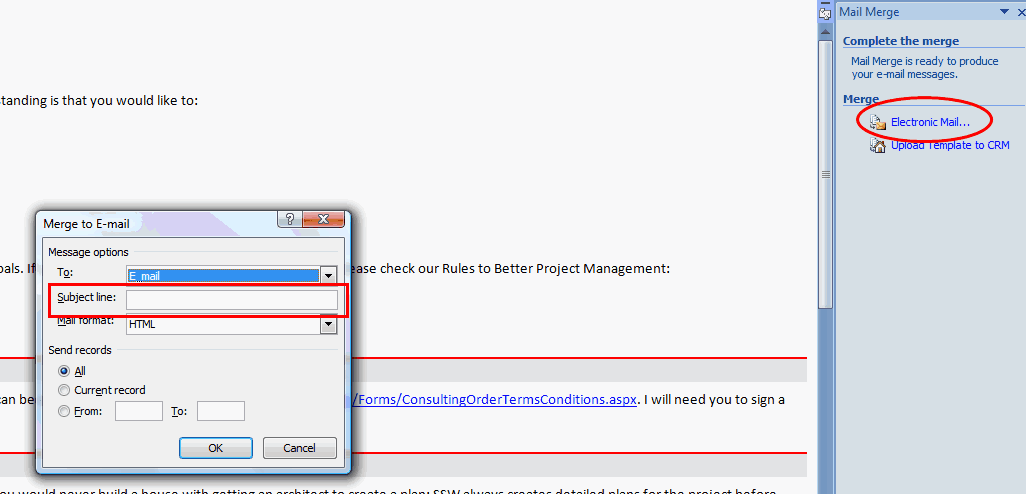
- Figure: Fill in subject line for email
- Click Ok to proceed to next step.
- Now because we're using CRM outlook, CRM mail merge will give you an option
to create the activities that associated to this email. Check Create
Microsoft Dynamic CRM Activities radio button, and uncheck the Include an
ubsubcribe link in the email message to create the activities.

- Figure: Create activies for emails sending out using mail merge
- Click Ok to send emails using your outlook.

 Posted in: CRM 2011 Mail Merge
