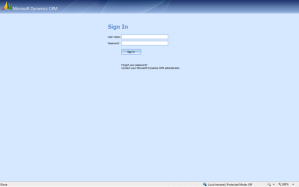
Whiz or novice I’m somewhat in shame to tell you that I was unable to configure MS CRM Internet facing deployment for the last few months since its released. I did everything from CRM Side, configured DNS and other infrastructure components accordingly but where I got stuck was ISA. With only a moderate understanding of ISA 2006 I tried my best to get it published but was not able to complete same. This didn’t mean that i wasn’t able to publish my company’s’ CRM deployment to Internet, but I was not getting the desired outcome, which is this beautiful Screen.
I was stuck with the below dialog box which served the purpose but not as “Sexy” as the above sign in screen.
The other drawback was that the CRM Outlook client was not able to authenticate and connect to the CRM Server when it was outside corp. network and naturally people were complaining.
There are plenty of resources in getting IFD configured and some of these even included information on getting the ISA settings applied. But since non of these guides helped me in getting this resolved I decided to publish one of my own guides to on IFD. This doesn’t at all to invalidate the effort and contributions made by other experts as they helped me in getting it completed up to 99.9%. (The issue actually was just a missing “Check – Box” on ISA publishing Rule)
So, Here are my Steps:
CRM & Infrastructure Configuration:
1. First of all its recommended to get the much needed understanding of IFD environment and what’s really happening to your CRM server once you configure it. For same I’m highly recommending the following reading “Microsoft Dynamics CRM 4 IFD Setup Scenarios.docx”2. Identify the CRM Organizations you want to publish out if you are running multiple organizations (MS CRM 4.0 Enterprise edition only).3. Find out the unique names of these organizations which you use in the local URL to access via web in the internal network. This also can be taken from the Deployment Manager under organizations. Using these names you’ll have to create your external DNS records in the following syntax:{unique name}.your-external-domain.your-tldfollowing table gives examples of these external access URLs, that you need to configure where the external domain name is given as externaldomain.com.
Internal Access URL Unique Name External Access URL 01 http://crm01/org1/ Org1 http://org1.externaldomain.com 02 http://crm01/orgabc orgabc http://orgabc.externaldomain.com
ISA Server Configuration:
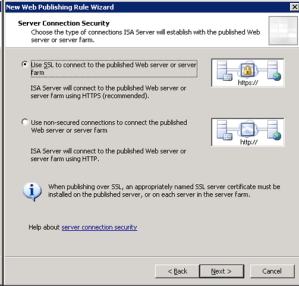
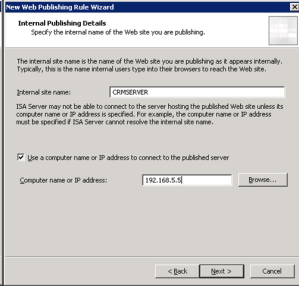
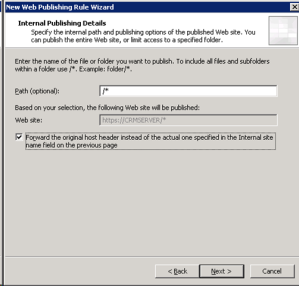
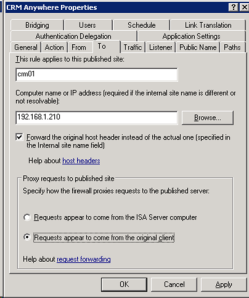
8. Open ISA Server Management Console, go to tasks on the right pane and select “Publish Website”9. On the wizard, start by giving a proper name for your rule, and click next10. Select Rule action as Allow and click next11. Select “publish Single Website or Load Balancer” and Click next12. If you are planning to publish it with SSL enabled, (Which is highly recommended) select the below option:Otherwise select the “not secured connections…” option.13. Provide the internal URL (without http:// prefix) and the IP address of the Server14. On the below screen select the publish path as “All” by typing /* on the “path” entry boxEnsure that the “Forward the original host header instead of the actual…” check box is Checked. (this is one of the things that i initially didn’t do and which caused repeated failures)15. Under Public Name Details, specify “Access Requests for” as “This Domain Name” and provide public which is {unique name}.externaldomain.com, (in our test case for “Orga” it will be orga.externaldomain.com)and publish the entire path by providing /* on the path specification. Use the “Site” preview to check the external URL is correct.
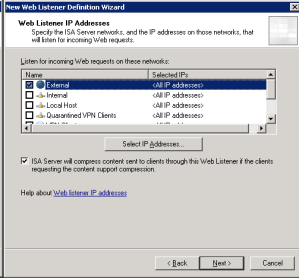
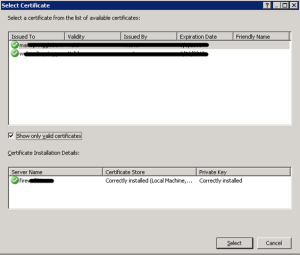
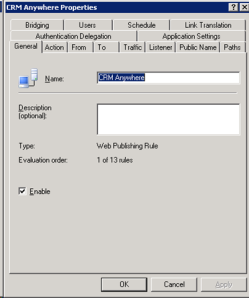
16. On the next screen select, new web listener, and on the second wizard which opens specify a proper name for the listener.17. Depending on how you will be publishing CRM select whether to use SSL or not on the next screen.18. Select the External Network on the web listener IP address selection screen. If you have multiple IP addresses bound to the external interface of your firewall you can select a specific IP address for which the External CRM DNS entries are valid, using the select IP address button.19. If you have selected SSL connections for the listener in the previous step, select the appropriate SSL certificate which is valid for the external URL of the CRM server and associate it with the listener on the next screen using the select certificate button. you will have to install the certificate on the ISA server prior to this selection.20. On the next screen, on Authentication Settings, Select No Authentication from the drop down list.22. Finish and Close the Web Listener wizard and move back to the Rule Creation Wizard, Select the Web Listener you created and click Next23. On the Authentication Delegation Settings Screen, select “No Delegation, but client may authenticate directly”24. On the User Sets, Select access for all users25. Click Next and Finish the Wizard. Are we done? I’m Afraid Not. These are the things i later discovered to make it work.26. Double Click on the newly created rule and open the Rule Properties.27. Select To tab and under proxy requests, select “Requests appear to come from the original client”28. Click apply and Navigate to the Listener tab. Click properties button to access the properties for the selected listener.29. Go to Authentication tab and click on advanced to bring in “Advanced Authentication Options” dialog box. Check, Allow client authentication over HTTP and click ok. (Note: you have to do this only if you are not using SSL on your listener, If you are using SSL this check box will be disabled.)30. Click ok twice and apply all changes to ISA using the Apply button on the top of the console. and NOW YOU ARE DONE.
Enjoy the CRM IFD environment which is usable both via web and via CRM Outlook Client.
Special thanks to ForeFront TMG Product team on their article at http://blogs.technet.com/isablog/archive/2008/07/23/publishing-microsoft-crm-4-0-through-isa-server-2006.aspx which explained all of the above steps except for the few I dug up myself, which are Step 27 and 29.
======================================================================================
This is content from http://www.dynamics-crm-2011.de | Dieser Beitrag ist von http://www.dynamics-crm-2011.de
Themen rund um CRM 2011 onpremise, Dynamics CRM 2011 Online, Dynamics CRM 2011 mit IFD und Claims.
+++++++++++++++++++++++++++++++++++++++++++++++++++++++++++++++++++

 00:29
00:29
 Dynamics Consulting München






 Posted in:


